How to Set Up Microsoft 365 Business Email in 4 Easy Steps
Elizabeth Kraus has more than a decade of first-hand experience building and growing a boutique digital marketing agency and double that in small and mid-size business marketing management. She provides expert answers torayapp questions related to branding, content marketing, web development, email, social media, and SEO.
Hazel Emnace writes content for small businesses in the USA, Australia, South East Asia, and New Zealand, from engaging copy to marketing tips for business owners.
This article is part of a larger series onBusiness Email.
Microsoft 365 comes with Outlook, one of the best business email tools on the market. Plans with Outlook stand out for high storage and attachment limits, advanced features, and Microsoft’s famous productivity suite. Set up Microsoft 365 business email by selecting the best plan for your business, connecting your domain, and creating your Outlook email address.
1. Select a Microsoft 365 Plan
To start,visit Microsoft 365’s website. Review available plans by clicking on “Microsoft 365” at the top of the page and choosing the “Business” button. Once you find the one with the apps your business needs, click the “Buy now” button.
Compare Microsoft 365 Business Email Plans
Open the tabs below to decide which plan best fits the needs of your business:
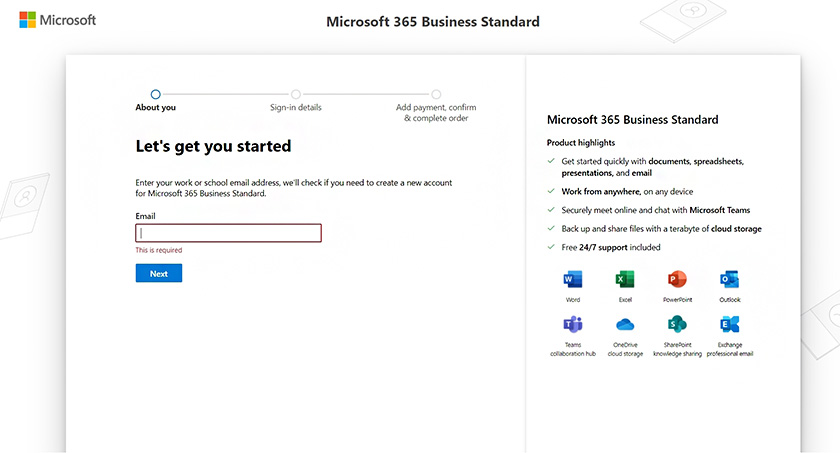
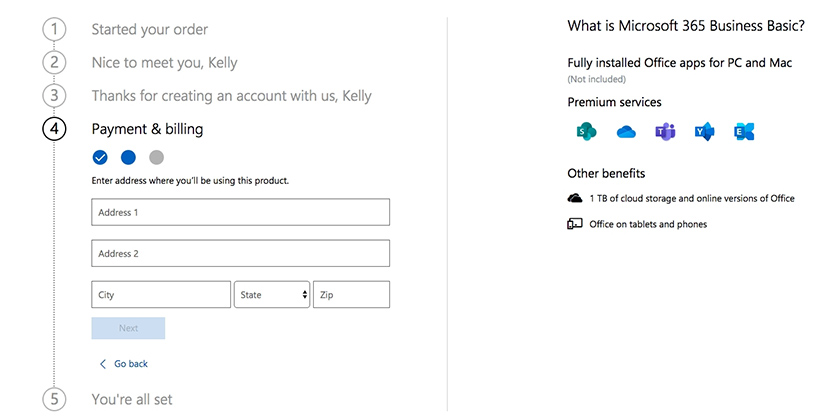
Follow the prompts to set up Microsoft 365 business email. (Source: Microsoft)
Follow the prompts to set up your account, decide how to sign in, and input your business details and payment information. When everything is complete, confirm the details to continue your Microsoft 365 account and new business email setup.
Outlook provides advanced time-saving features and automations its competitors can’t easily replicate. This makes it perfect for businesses that value security, workflow streamlining features, and high storage. Take advantage of Microsoft’s 30-day free trial to find out why Outlook is a top choice for business email.
2. Connect Your Domain (or Buy One)
Next, indicate whether you will connect abusiness domain nameyou already own or buy a new one for Microsoft 365 business email setup in Outlook. If you have a domain, select “Use a domain name you already own.” Then, input your domain name in the bar below and click “Verify ownership” to begin the domain verification process.
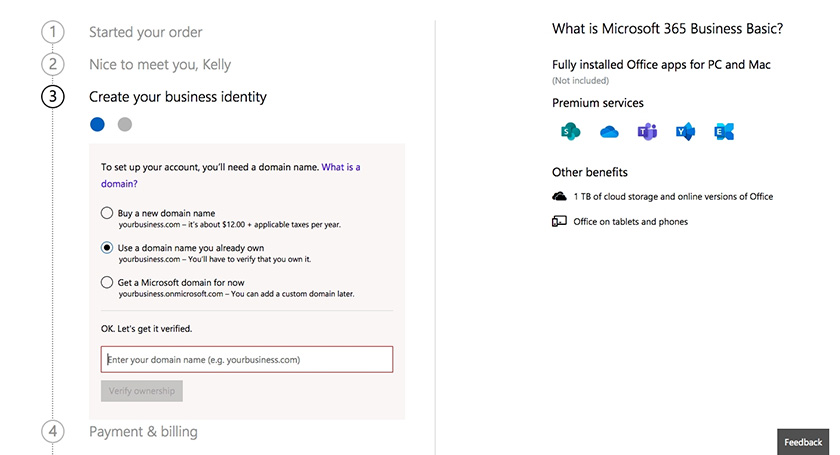
Start connecting your domain by inputting your domain name.
If you don’t already own a domain name, you can purchase one directly from Microsoft during the setup process. Alternatively, you can buy one from adomain name registrarlike Domain.com for around $12 to $15 a year.
On a tight budget but need a domain? Check out some legitimate ways to get afree email domainwith other services your business needs.
Verify Ownership of Your Business Email Domain
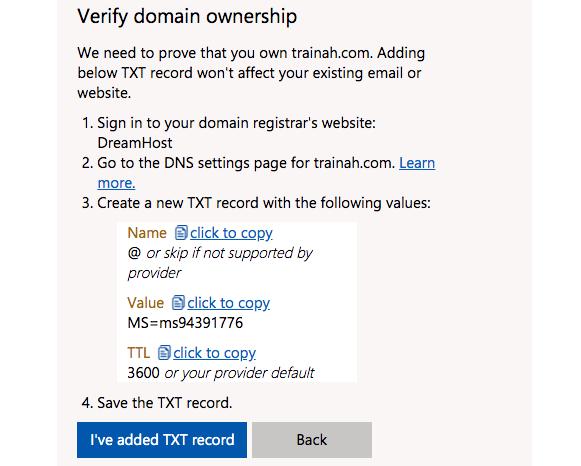
After inputting your domain name, Microsoft will look up your domain and request that you verify ownership of it by adding your domain’s DNS settings. This involves copying the provided TXT record information from Microsoft to your domain’s corresponding settings.
To do this, navigate to the domain name registrar you used to purchase your domain. Where to find your DNS settings will vary based on where you bought your domain name. We included links to set up information for several popular domain registrars below.
Once you’ve found the settings, copy the TXT value from Microsoft and paste it into your domain’s TXT value so the two match.
按照说明来验证you own the domain inputted.
After updating your domain name’s DNS settings with Microsoft’s TXT record, navigate back to Microsoft and click the “I’ve added TXT record” button. Keep in mind that it can take up to 10 minutes to verify your DNS records. Once it’s been verified, you can move on to the next step of creating an Outlook email for business.
3. Create Your Business Email Address
Next, you will be prompted to input your email user ID and create and confirm a password to finish the Microsoft business email setup and start using Outlook. The user ID is the username you want to use for your email address (e.g.,yourname@yourdomain.com).
If you’re unsure what to use for your email ID, learn more about choosing aprofessional email address format. After inputting your desired email address and password, click the “Sign up” button.
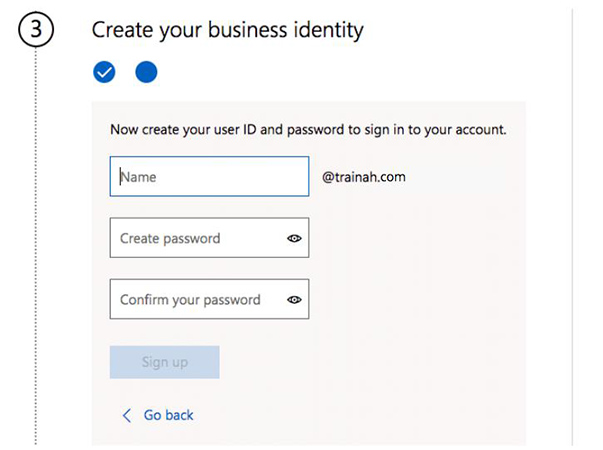
Fill out the fields to create your Microsoft user ID then click the Sign up button.
The format you decide on for your professional email in Outlook is important for brand consistency going forward. To be sure you have landed on the best format for your brand’s business email, read our list ofprofessional email address ideasand examples.
4. Complete Your Purchase
The last step in Microsoft 365 business email setup is to add your payment and billing details. After verifying your domain and creating your email address, you’ll be asked to input the number of accounts (or user seats) you want to purchase. This is where you can add additional users for your business under the same plan.
填写支付信息和fi签署nish setting up your Microsoft Outlook for business email.
After choosing the number of accounts to buy, click the “Next” button and input your billing information. When done, click “Next” again and input your payment information. Once you’ve completed the payment, you can access your new account and use your business Outlook email.
Ready to start exploring the advanced features and tools you get with Microsoft 365 business email? Get a closer look at the top reasons why businesses choose Outlook in our review ofOutlook for business email.
Next Steps After Microsoft 365 Business Email Setup
一旦你完成了微软365年业务邮件setup, you can then use business Outlook email for your company. There are dozens ofMicrosoft Outlook featuresthat can streamline your business email. Here are some basics to help you get more from your Outlook business email right out of the gate:
- Customize settings: On your Microsoft Outlook inbox, click on the “File” menu in the top-left corner of the Outlook window and select “Options.” From here, customize your inbox’s theme, font size, and notification settings. You can also access these settings straight from the Outlook ribbon by clicking on the “Home” tab and choosing “Options.
- Set up calendar and contacts: Set up and customize meeting scheduling and contact storage tools by choosing either “Calendar” or “People” in the bottom left corner of the Outlook window. Outlook also allows you to sync with an existing email calendar, import, share, or create multiple calendars from the “File” menu.
- Organize your inbox: Use folders, flags, and categories to organize your inbox and keep track of important emails. Streamline email management and handling using filters and multi-layered rules.
- Add add-ins or plug-ins: Install add-ins from the Office Store to enhance your inbox functionality and integrate it with other apps and services. Although the best add-ons and plug-ins depend on your business needs, some of the most popular ones include Trello, Boomerang, ClearContext, and Evernote.
- Turn on sync with other devices:Set up Outlook to sync with your other devices (e.g., smartphone or tablet) to stay connected from anywhere.
Frequently Asked Questions (FAQs)
Can you get Outlook email for free?
You can use the Outlook email app for free and even create a free Outlook email address (e.g.,yourname@outlook.com). However, this doesn’t allow you to use a branded domain for business email, so it’s not best for business use. There areways to get a free email domain—for example, the purchase of a domain with IONOS comes with a free email account. You can connect to Outlook, but you’ll still need a Microsoft 365 plan to do so.
What’s the difference between Microsoft 365 Home & Business Plans?
The main differences between Microsoft 365’s Home vs Business office suite plans are pricing and the apps included. Home plans cost $6.99 to $9.99 with monthly billing and can be shared with up to five users, whereas Business plans are range from $3 to $22 per month per user. But business plans also include more apps, includingMicrosoft Teams’ collaboration and chat capabilities, plus tools for video conferencing and webinars.
Which is better for business email: Microsoft 365 or Google Workspace?
Microsoft 365 and Google Workspace are both top choices forbusiness email. Each comes with a suite of productivity and collaboration tools. Google Workspace (and Gmail) is usually preferred by collaborative teams, while heavy email users or those wanting automations and integrations will get more from Microsoft business email via Outlook business. Get the full breakdown ofGoogle Workspace vs Microsoft 365.
Bottom Line
Microsoft Outlook is one of thebest email providersfor small businesses, thanks to sophisticated software and advanced features. The process for Microsoft 365 business email setup is fairly straightforward and can be completed in a few minutes.
With your 365 business plan comes world-class email in Outlook and a full suite of productivity and collaboration tools, including Microsoft Teams, MS Word, Excel, PowerPoint, and more. Get started with Microsoft’s 30-day free trial today.