How To Customize Invoices in QuickBooks Online
Tim is a Certified QuickBooks Time (formerly TSheets) Pro, QuickBooks ProAdvisor, and CPA with 25 years of experience. He brings his expertise to Fit Small Business’saccountingcontent.
Mark has researched and reviewed accounting software at Fit Small Business since 2019 and has developed an extensive knowledge of accounting software features and how unique business needs determine the best accounting software.
This article is part of a larger series onAccounting Software.
We’ll cover how to customize invoice templates in QuickBooks Online—you’ll learn how to create a new template and then customize it by adding your company logo and changing the colors and fonts. We’ll also show you the process of customizing other sales forms, including sales receipts and estimates.
As part of ourQuickBooks Online tutorial series, this lesson will help you learn the basics of QuickBooks. You can follow the steps using your QuickBooks account, and if you don’t have a subscription, you may choose between a 30-day free trial or 50% off for three months.
To create a new invoice template, click on the cogwheel in the upper right corner of the QuickBooks Online screen and then selectAccount and Settings. Next, chooseSalesin the left menu bar, and then click the greenCustomize look and feelbutton on theCustomizesection.
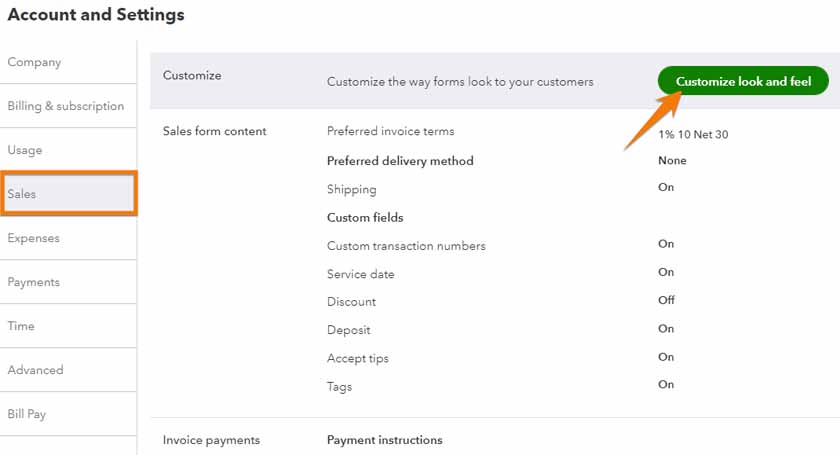
Click on “Customize look and feel” on the Customize section under the Sales tab
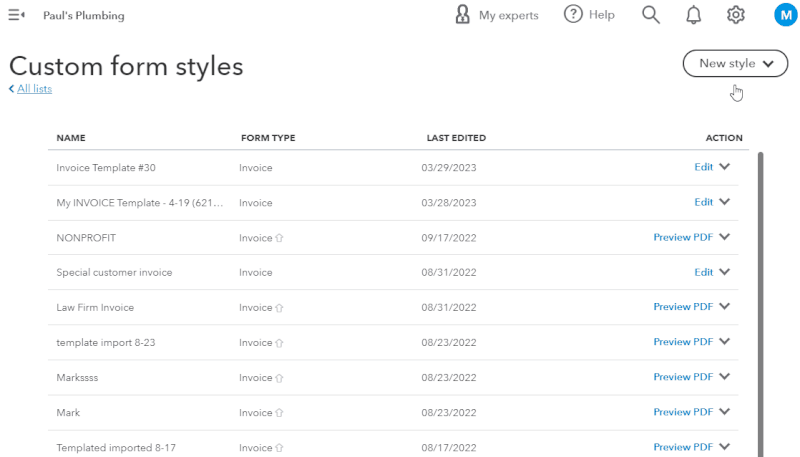
QuickBooks Online will take you to the custom form styles screen, where you can see the list of all the invoice templates you created or will create. If this is a new company, the only form style available is the default template named “Standard.” If you want to make only a slight adjustment, you can edit the default template by clickingEditon the far right side of the line.
If you wish to create a new template, hover over theNew Stylemenu on the upper right-hand side of the custom form styles window and selectInvoicefrom the drop-down.
Select invoice from the New style dropdown
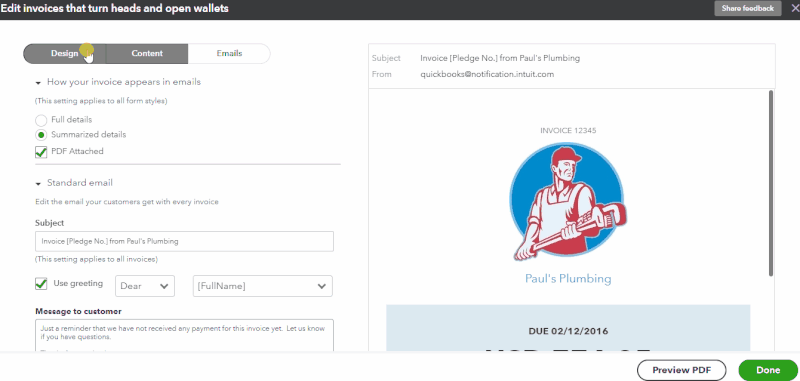
After clickingInvoice, QuickBooks will take you to the invoice customization form, which consists of three tabs:
- Design:Where you customize the overall design of your invoice template
- Content:Where you can edit the content of your invoice, including business name, contact details, and address, as well as add custom fields if needed
- Emails:Lets you edit the content of your invoice email, including a personalized message to your customer
Three tabs for customizing invoices in QuickBooks
From the Design tab, you can provide the name of your new invoice and customize its overall aesthetic design. There are five areas to design your invoice:
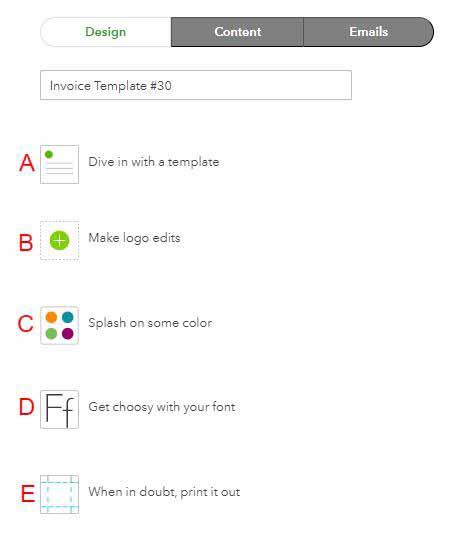
Five areas to design your invoice in QuickBooks
Heads up!
The descriptions change as you make revision. For instance, if you already added a logo, theAdd your unique logobutton changes toMake logo edits, so don’t be confused if you’re seeing different descriptions on your screen.
After you click onDive in with a template or Change up the Template, you can choose from six options. Click on each to see a preview, then select the one you think best suits your business’ image.
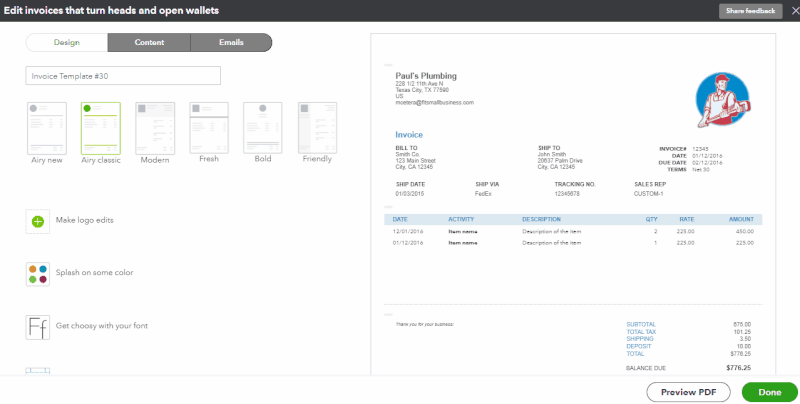
Choose an invoice template in QuickBooks Online
Click the greenDonebutton to apply a template to your invoice.
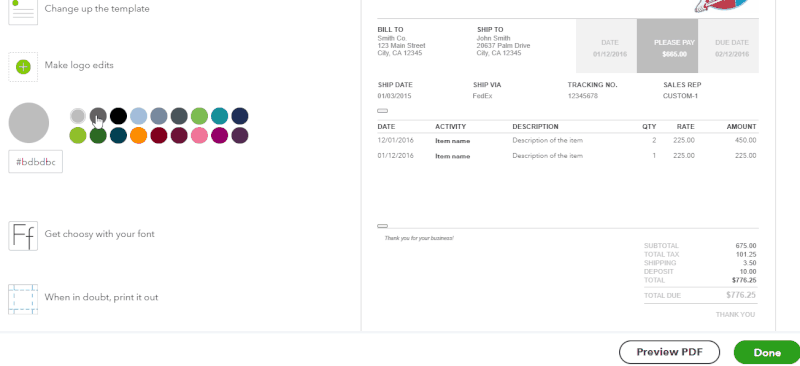
If it’s your first time adding a logo, click onAdd your unique logoand then select the green plus sign under Add a logo. If you have already uploaded a logo, the description of the button changes toMake logo edits.
QuickBooks provides a window to browse your computer and select the image file of your logo. After selecting the image file, clickSaveto show a thumbnail of your new logo.
Logo uploaded to QuickBooks Online to be used for invoices
Once your logo is uploaded, QuickBooks will automatically place it on the top right corner of your template. However, you can change the placement by selecting the buttons underPlacement. Also, you can adjust the size of your logo (i.e., small, medium, and large). Play around with the options until you settle on how to display the logo. If you decide you don’t want the logo in your invoice, click onHide logo.
New logo uploaded on QuickBooks Online
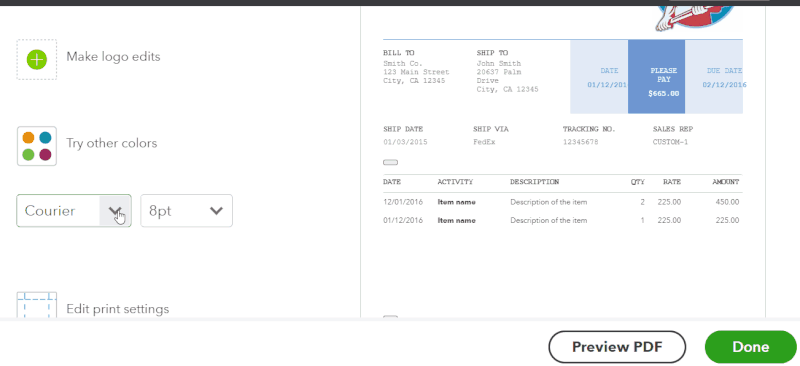
Click onSplash on some colororTry other colorsto select the color of your template. You can choose from 18 colors:
Choose a color for your invoice in QuickBooks Online
Custom colors:
You aren’t limited to the 18 predefined colors. The text box located under your color selection is an HTML color code, which you can input manually for a nearly infinite selection of color. If you want to apply a different color, you can use a website that provides HTML color codes. See the screenshot below as an example.
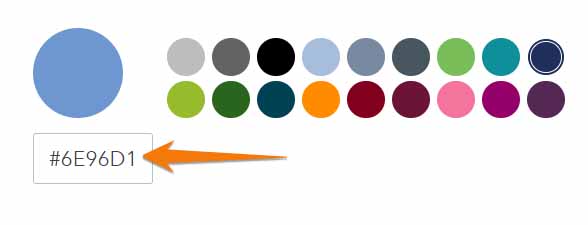
Adding a custom color to apply to your invoice in QuickBooks Online
ClickGet Choosy with your font(orSelect a different fontif you’ve clicked there before) to view a selection of four fonts and three sizes.
Choose a font style and size for your invoice in QuickBooks Online
The final task under the Design tab is to set your print options. SelectWhen in doubt, print it out(orEdit print settingsif you’ve already clicked there) to view the following options for printing your invoice.
- Fit to window envelope:Click the checkbox to adjust your template to fit into standard #9 and #10 window envelopes.
- Include payment stub:QuickBooks will print a dividing line, turning the top portion of your invoice into a payment stub. This will help you match payments received to outstanding invoices, which is especially useful if you send numerous invoices for the same amount.
- Use letterhead paper:This removes the company name, address, and logo from the top of the invoice. This allows your emailed invoices to include your business information and logo, but these can be removed quickly when printing on company letterhead.
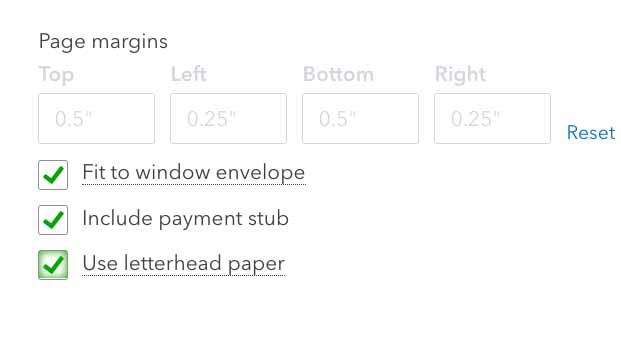
Print options for your invoice in QuickBooks Online
You can see how your invoice template looks by clicking thePDF预览button in the lower right corner of your form. When you are satisfied with the custom design of your invoice, click the greenDonebutton.
To give you an idea, here’s a sample invoice template customized using the aforementioned steps.
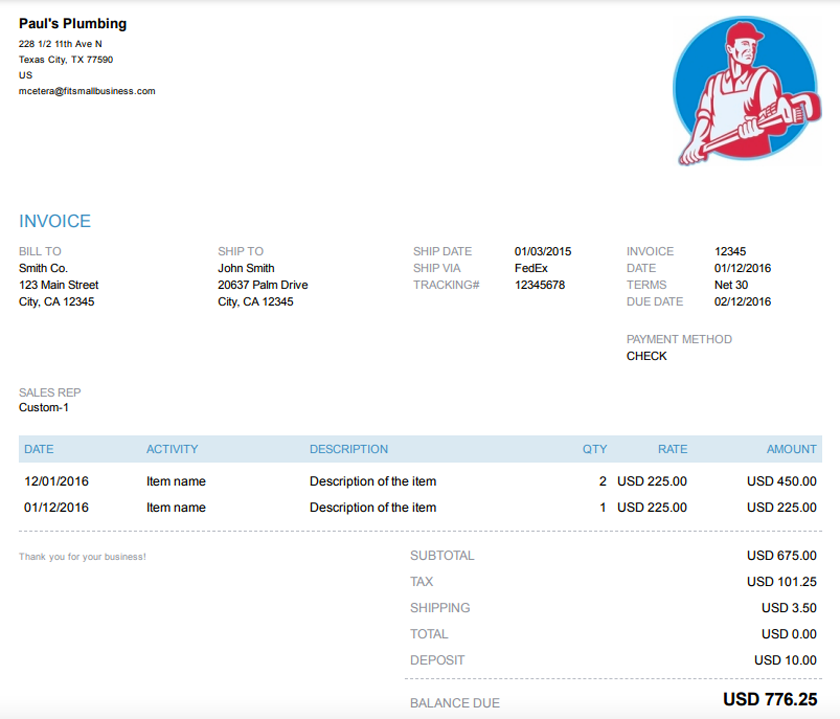
Sample invoice template in QuickBooks Online
Tip:
The type of invoice template you need varies depending on several factors, including whether you sell products or services and if you need to include discounts. We’ve put together a selection offree QuickBooks invoice templatesthat you can download.
The next two tabs in the invoice customization screen are Content and Emails. To customize the content, click on the pencil icon on the grayed area in the Content screen and then edit the important details, such as business name, phone number, and email address.
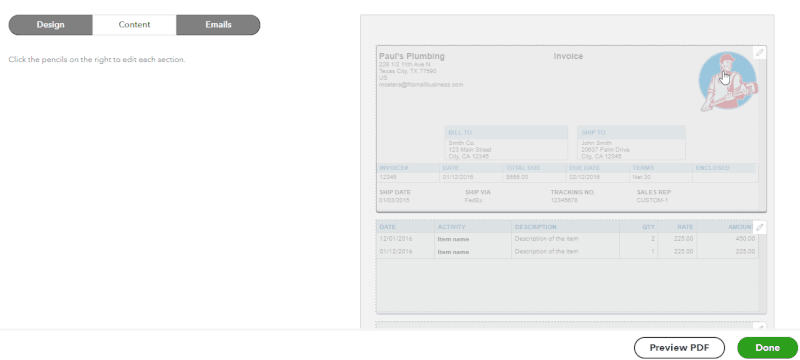
Customizing your invoice content in QuickBooks
For more detailed instructions, head to our tutorial onhow to set up sales form content in QuickBooks Online.
From the Emails tab, you can control how you want your invoice to appear in your email. You’ll find settings to personalize your standard and reminder emails, including adding specific subjects, greetings, etc. You can also add a personalized message to your customer if you desire.
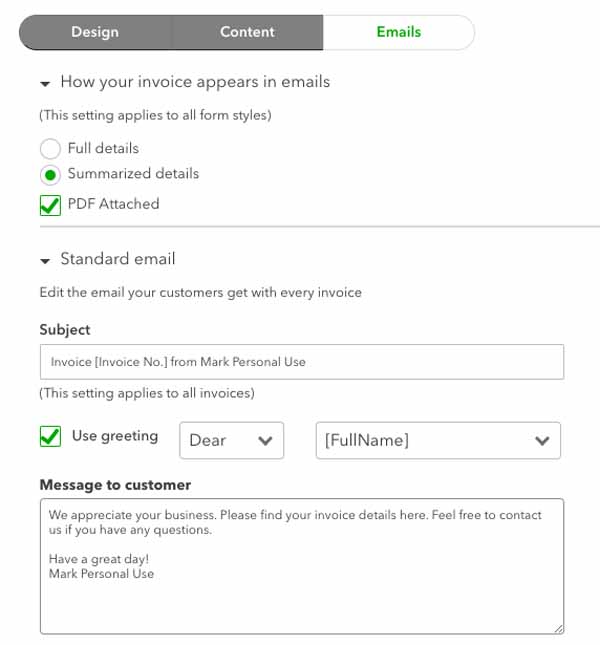
Customize invoice emails in QuickBooks
Check out our tutorial onhow to set up messages in QuickBooks Onlinefor more comprehensive instructions.
How To Create Custom Estimates and Sales Receipts in QuickBooks Online
,现在你已知道如何制作一个自定义的模板,you can produce custom templates for estimates and sales receipts. The steps are identical to the process we used to create your customized invoice. From the custom form styles screen, clickNew style, then select either Estimate or Sales receipt.
You have the same design options for estimates and sales receipts as invoices. We suggest that you make the custom format similar to your invoices but different enough that it’s easy to tell each of the forms apart to avoid confusion. It’s important that customers don’t mistake invoices for estimates.
The Importance of Customizing Sales Forms
As ourbest small business accounting softwareandbest invoicing softwareQuickBooks在线脱颖而出的职业al-looking invoices, estimates, and sales receipts. However, the default forms aren’t very impressive, so we highly recommend customizing your invoices, receipts, and estimates to enhance your brand and improve business communication. You can build brand awareness and enhance brand recognition with a well-designed logo on a unique invoice.
Additionally, customizing your sales forms can help you increase sales in different ways. For example, customizing the design of your invoice makes it look more professional and attractive—which may encourage your customers to pay faster and consider doing more transactions with you in the future.
Frequently Asked Questions (FAQs)
Yes, you can. However, we recommend that you create and customize your sales forms to reinforce your company’s image and professionalism to your customers. Invoices with customized designs stand out when compared to general-looking invoices.
You can customize invoices by uploading your company logo and adjusting invoice colors and fonts, adding fields unique to your business, and including a personalized message for your customers. You can do these from the invoice customization form, which you can access from the Customize section of the Sales tab under Account & settings.
Wrap Up
You just learned how to customize invoices in QuickBooks Online. Consider making multiple invoice templates for different types of sales. For instance, you might want to omit the shipping address and method for service invoices. Our next tutorial is abouthow to set up sales form content in QuickBooks Online, where you’ll learn how to designate what content will show on your invoices, estimates, and sales receipts.