How To Manage Customers & Create Invoices in Xero
This article is part of a larger series onAccounting Software.
In this guide, the second in our series offree Xero courses, we’ll go over how to create an invoice in Xero and how to send one, as well as how to view open invoices and run an aged receivables summary report. We’re also going to cover how to add, view, and manage your customers.
We created our tutorials to help you better understand how to use Xero, one of ourbest small business accounting software.You’ll receive the most benefit from this by following along in your own account. If you don’t yet have one, you can try the platform for free for 30 days, no credit card required.
Step 1: View and Add Customers in Xero
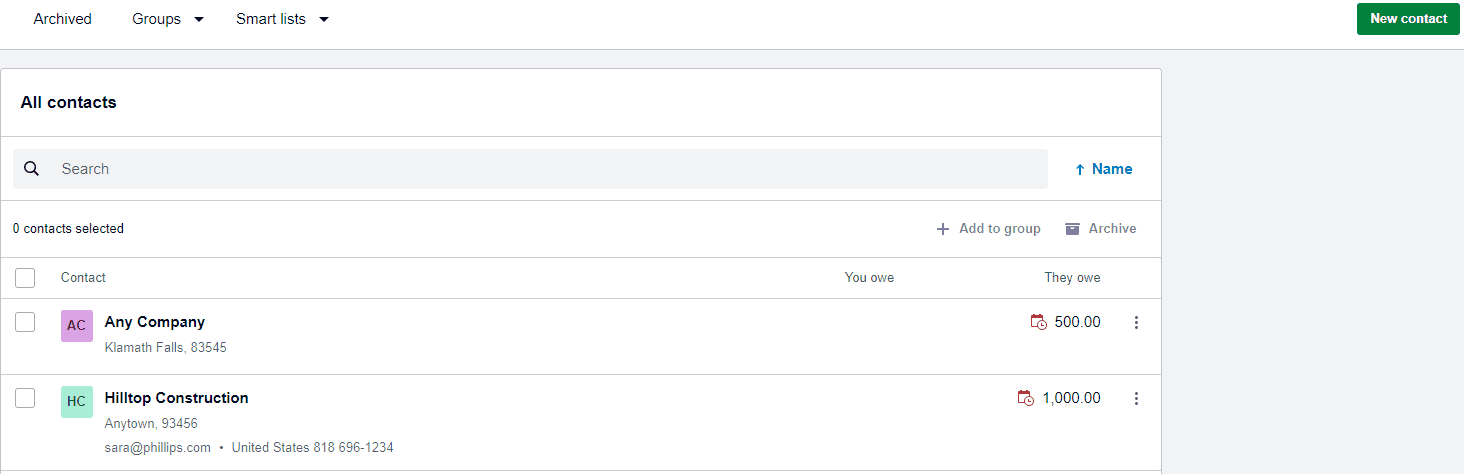
In Xero, contacts are arranged intoAll,Customers, andSupplierscontact groups, and you can access these by navigating toContactsin the menu bar at the top of the page. When you add or import new contacts, they will automatically appear in the All group. Once you have entered an invoice, bill, or credit transaction for a customer, its classification will change to Customer or Supplier.
You can’t move contacts manually into the Customers or Suppliers group, and if you see a contact name listed as “unknown,” it’s likely because this contact was created during cash coding and the payee field was left empty. To add a contact name to the payee field after the fact, edit it in the Contacts field. See more information about how to edit contact details below.
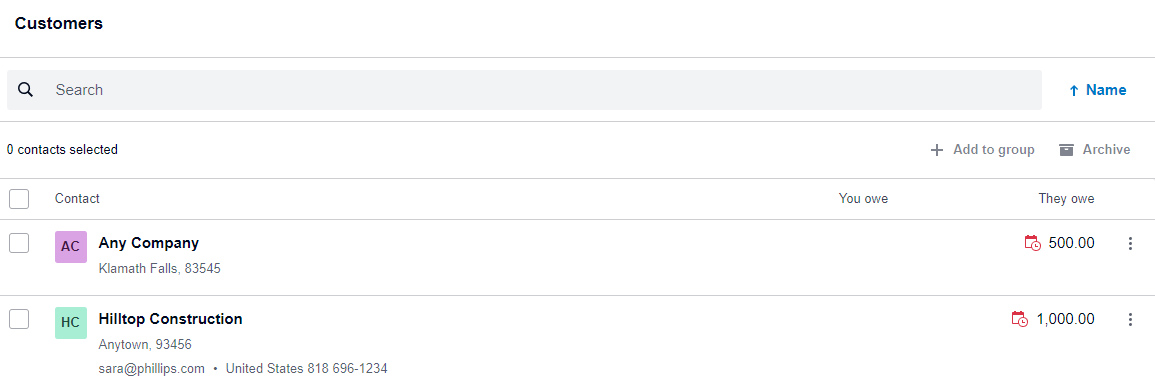
Navigating to Contacts in Xero
Click onCustomersto view your client list. Also shown are the company name, address, and contact info along with the amount you’re owed, if any.
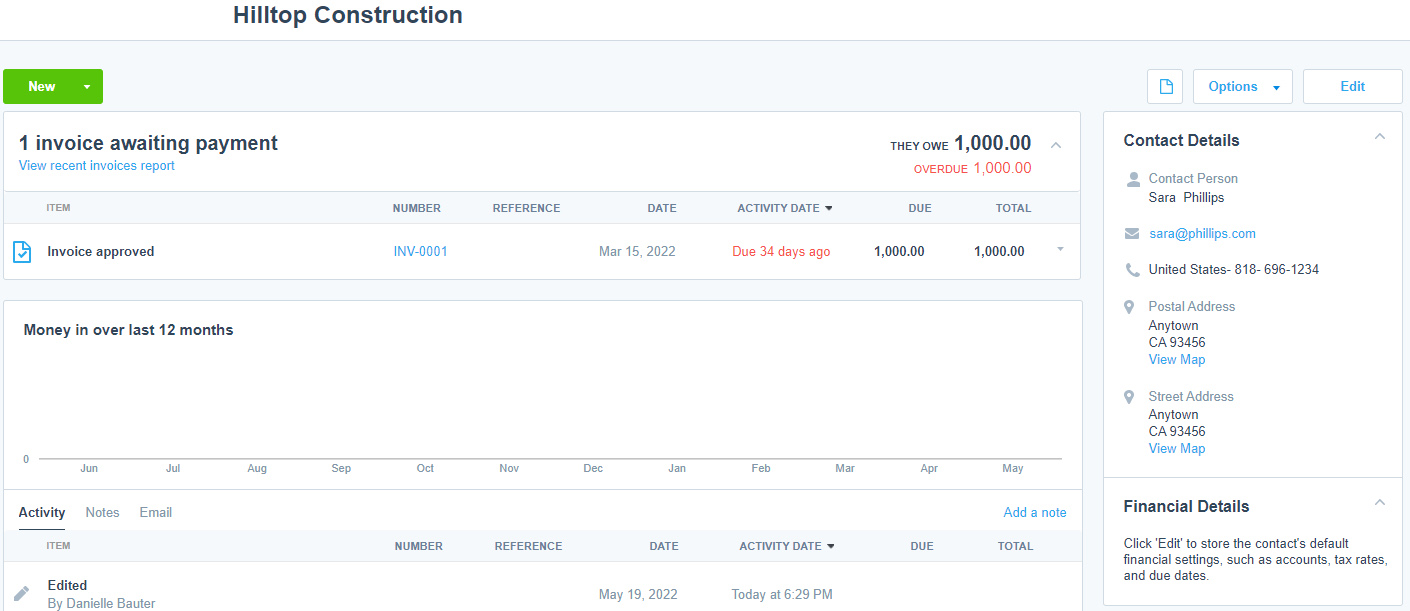
Customer list in Xero.
View and Update Contacts
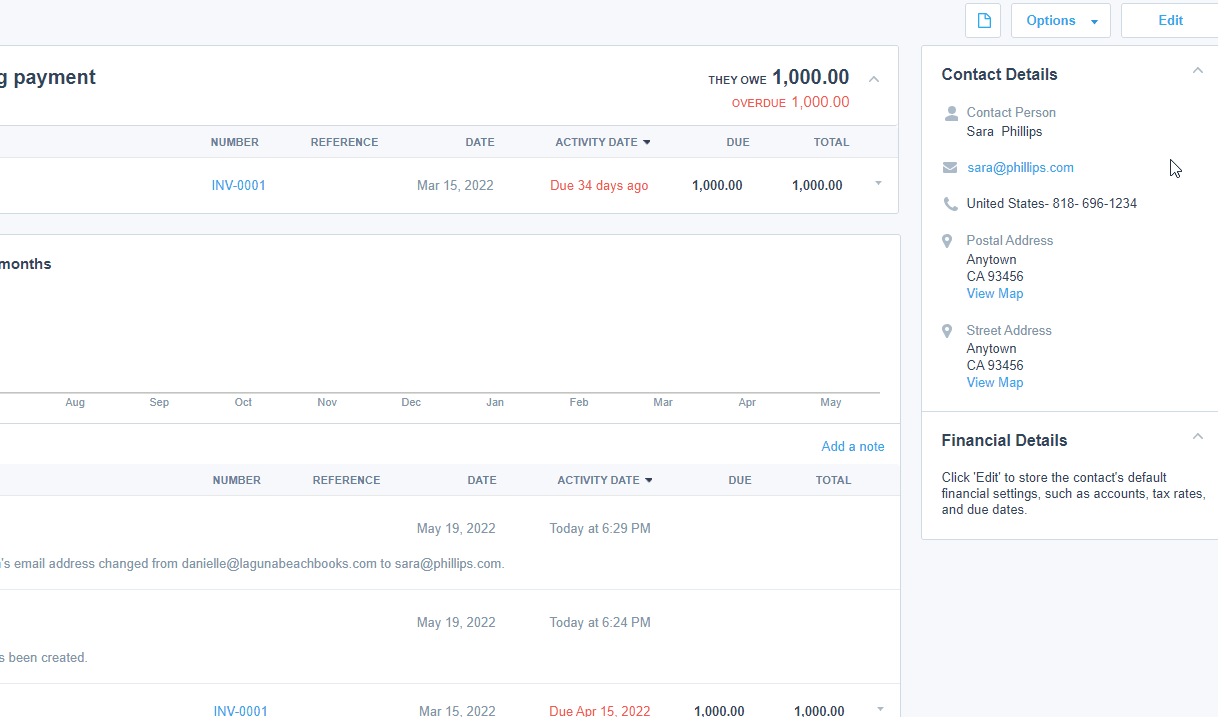
选择一个customer name to view the details. In the example below, Hilltop Construction has one invoice awaiting payment. A report showing money received in the last 12 months is also displayed. To the right is a summary of the contact details.
Customer details in Xero
Add Contacts
To add a new contact, click theNew contactbutton in the upper right-hand corner. There are two sections that you’ll need to complete, Contact Information and Financial Details, which are discussed in more detail below.
Adding a Contact in Xero
When adding a contact, you’ll want to enter as much information as possible, including:
- Contact Name
- Account Number
- Primary Person
- Phone, Fax, Mobile, and Direct Dial
- Skype Name/Number
- Website
- Postal Address
- Street Address
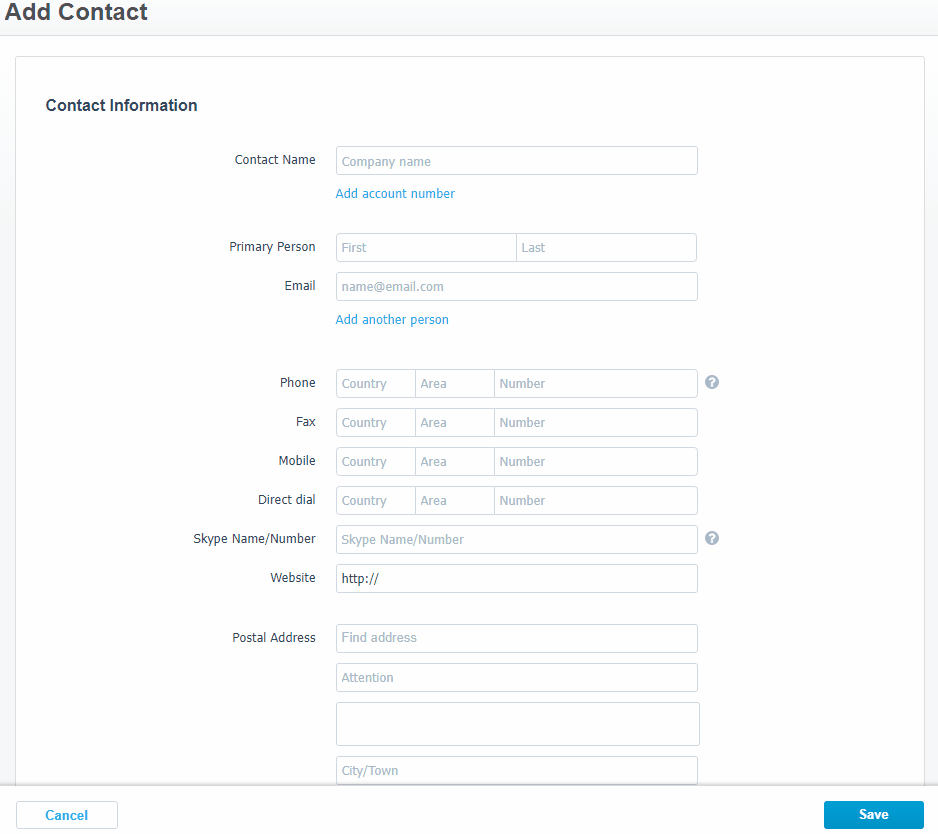
Contact information in Xero
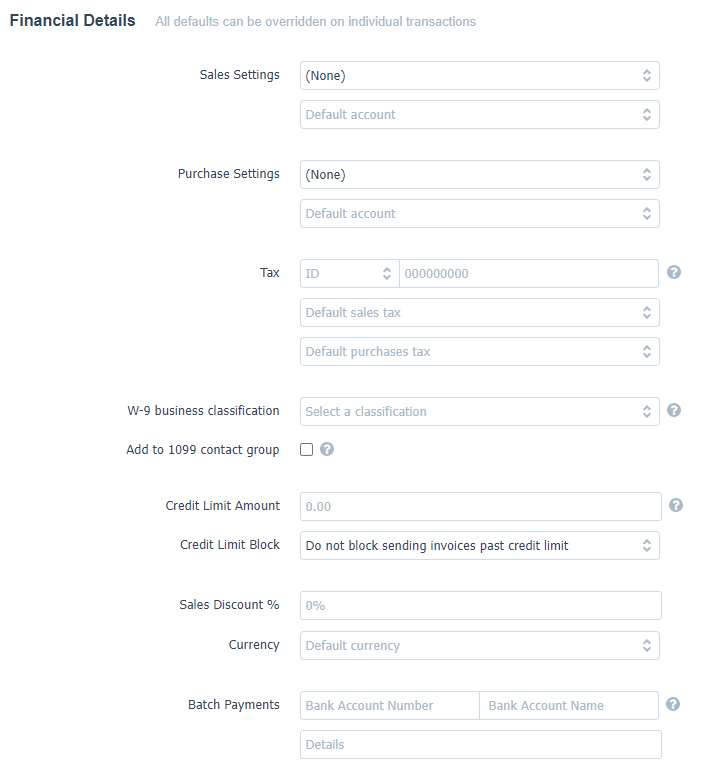
In the Financial Information section, you can also enter default settings that will help with invoicing. All defaults can be overridden in individual transactions. These financial details include:
- Sales Settings:These settings include Tax inclusive, Tax exclusive, or No tax. You can also select a default income account for these sales.
- Purchase Settings:This is applicable for suppliers, not customers, so you can leave this blank.
- Tax:Enter the customer’s tax ID number and indicate which sales tax should be charged on sales.
- W-9 Business Classification:W-9s apply to vendors, not customers, so you can leave this field blank.
- Add to 1099 Contact Group:Form 1099s are never sent to customers, so you can leave this field blank.
- Credit Limit Amount:Indicate the credit limit you wish to extend your customer, if desired.
- Credit Limit Block:Choose whether you want to block sending invoices past the credit limit.
- Sales Discount:If you extend a sales discount to your customers, you can enter a percentage here.
- Currency:Select the default currency for this customer.
- Batch Payments:Indicate the bank account information if you expect to send batch payments.
- Invoice Theme:选择一个default invoice theme for this customer.
- Bills Due Date:This field is for vendors, not customers, so leave it blank.
- Invoices Due Date:If you’d like to assign a regular due date for this customer, you can indicate it here.
When you’re finished, be sure to click theSavebutton.
Contact Financial Details in Xero
Edit Contact Details
To edit the contact details, follow these steps:
- Step 1:Click theEditbutton in the upper right-hand corner.
- Step 2:Fill out the updated information.
- Step 3:Click theSavebutton.
Updating Contacts in Xero
To create a new invoice in Xero, follow these steps:
- Step 1:ClickBusinessin the top menu bar.
- Step 2:Scroll down toInvoices.
- Step 3:ClickNew Invoice.
Creating a new invoice in Xero
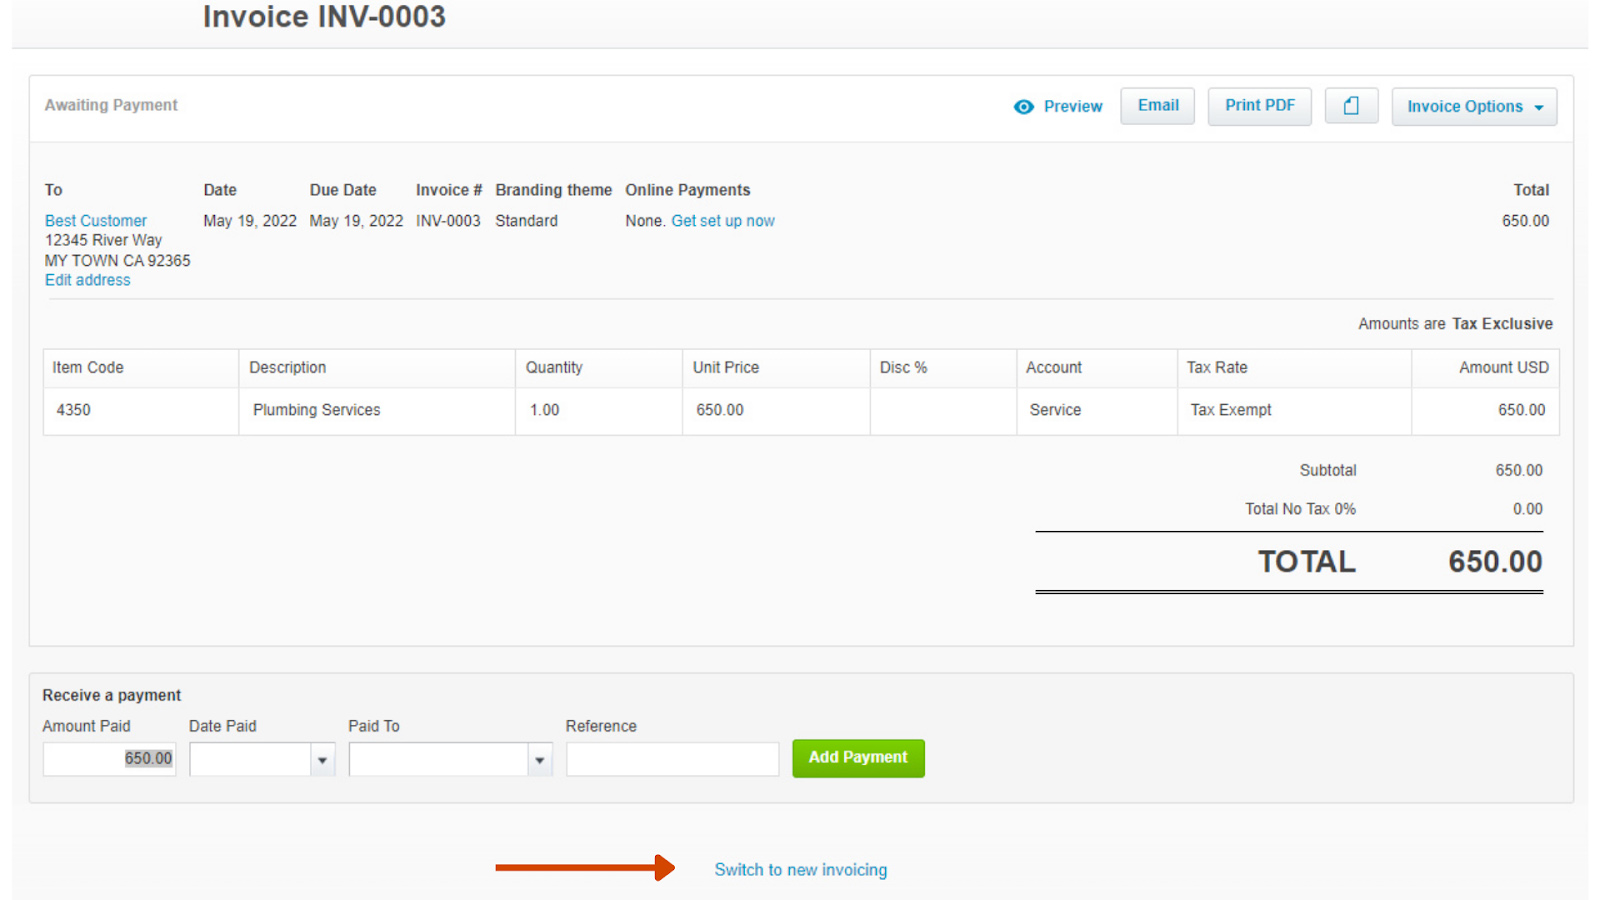
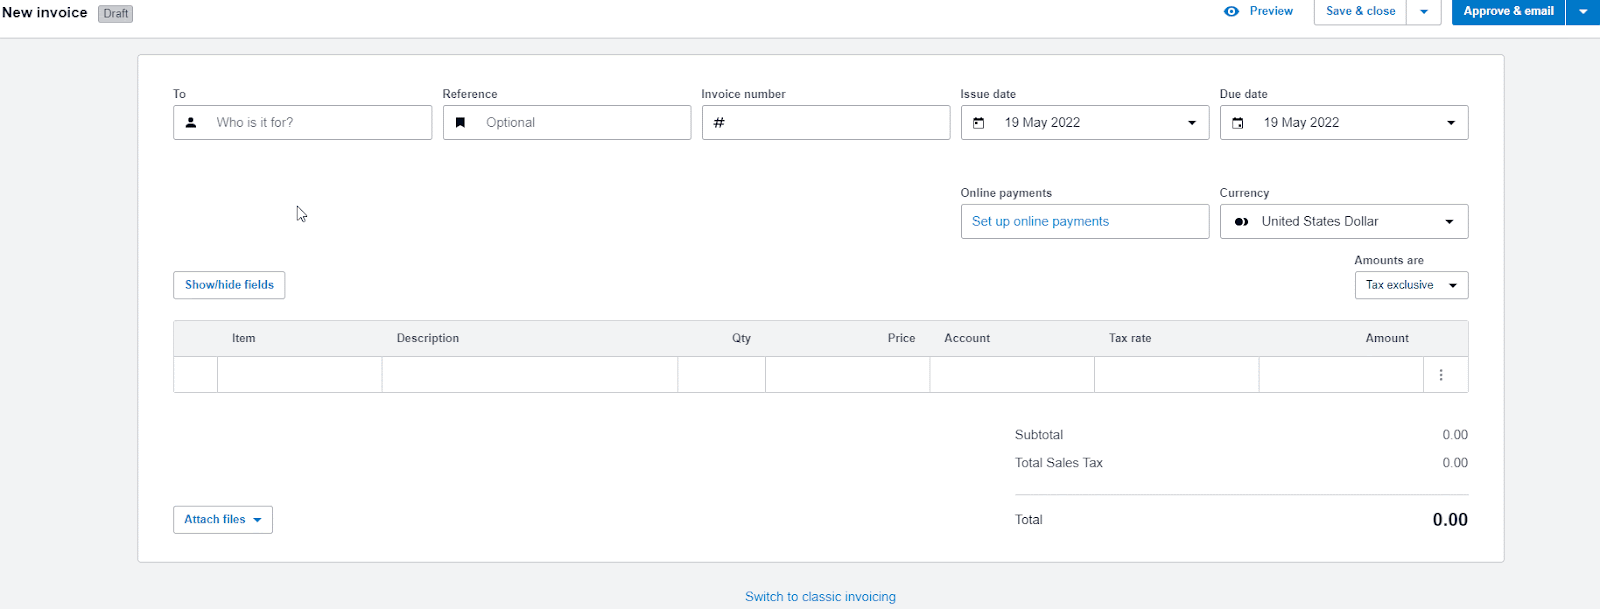
When you’re on the Invoice screen, you have the option of using New or Classic invoicing. Classic invoicing requires you to enter all the information manually while New invoicing prefills many of the details for you and saves your work automatically.
To check which one you’re on, view the link at the bottom of the screen. If it says, “Switch to new invoicing,” then you’re on the Classic invoicing screen. If it says, “Switch to classic invoicing,” then you’re on the New invoicing screen.
Switching invoice types in Xero
We recommend using new invoicing as it’s a simpler, faster way to invoice. With New invoicing, Xero will save the invoice every few seconds once you have added a contact. Invoice fields are filled with details automatically. You can update a detail if it isn’t correct. Features like customer credit limits and adding a delivery address are only available using New invoicing.
If you’re currently in classic invoicing, clickSwitch to new invoicingat the bottom of your screen. From here, follow these steps to create a new invoice in Xero.
- Step 1:In theTofield, start typing to select an existing contact or to add a new one. You can click on the contact name you’ve selected to view or edit their details. The default tax rate from the customer setup should be included automatically, but you can change it as needed.
- Step 2:In theItemfield, start typing to select an existing item from your inventory or add the details manually by adding the description of the item, then theQuantityandPrice.
- Step 3:Once you’ve finished entering your invoice, clickSave & closein the upper right corner. This will save the invoice as a draft. You can also click the drop-down menu next toSave & closeand select:
- Save & add another:To save the invoice as a draft and open a new draft invoice
- Submit for approval:To submit the invoice for approval
Creating an invoice in New Invoicing mode
Edit an Invoice
Follow these steps to edit an invoice in Xero:
- Step 1:In the upper navigation menu, click onBusiness.
- Step 2:SelectInvoices.
- Step 3:Click on theAwaiting Paymenttab.
- Step 4:点击发票你佤邦nt to edit.
- Step 5:Click on theInvoice Optionsdrop-down menu in the upper right corner.
- Step 6:SelectEdit.
- Step 7:Make your changes to the invoice. You can edit any field and drag and drop invoice lines to reorder them.
- Step 8:When finished, clickUpdate.

Editing an invoice in Xero
删除an Invoice
You can delete a draft or awaiting approval invoice or void an awaiting payment invoice in Xero. To delete an invoice:
- Step 1:In the Business menu, selectInvoices.
- Step 2:Click on theDraftorAwaiting Approvaltab.
- Step 3:Find and open your invoice.
- Step 4:Click on theInvoice Optionsdrop-down menu in the upper right corner.
- Step 5:Select删除for drafts on invoices awaiting approval; selectVoidfor invoices awaiting payment.
- Step 6:ClickYesto confirm.
Deleting an invoice in Xero
To email or print an invoice, you must first approve it. This can be done by navigating to theInvoicesscreen and clicking on theDraftstab. This will show a list of all invoices that haven’t yet been approved. Check the box next to the invoices that you want to email or print, and then selectApprove.
Approving an invoice in Xero
To print an invoice in Xero, select from the invoice list and click thePrint PDFbutton to generate a PDF copy of the invoice that can then be printed or saved for your records. This can be done for any invoice status—draft, awaiting approval, awaiting payment, or paid.
To email an invoice, click theEmailbutton. This will take you to theSend Invoicescreen, which shows a draft email that you can alter if desired. You can also elect to include attachments and send yourself a copy of the email.

Printing or emailing an invoice in Xero
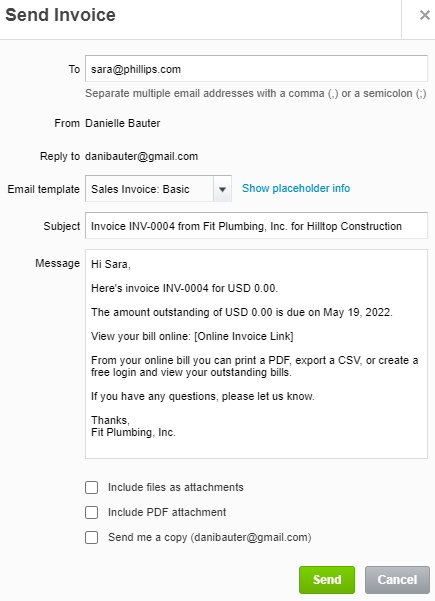
Email invoice detail in Xero
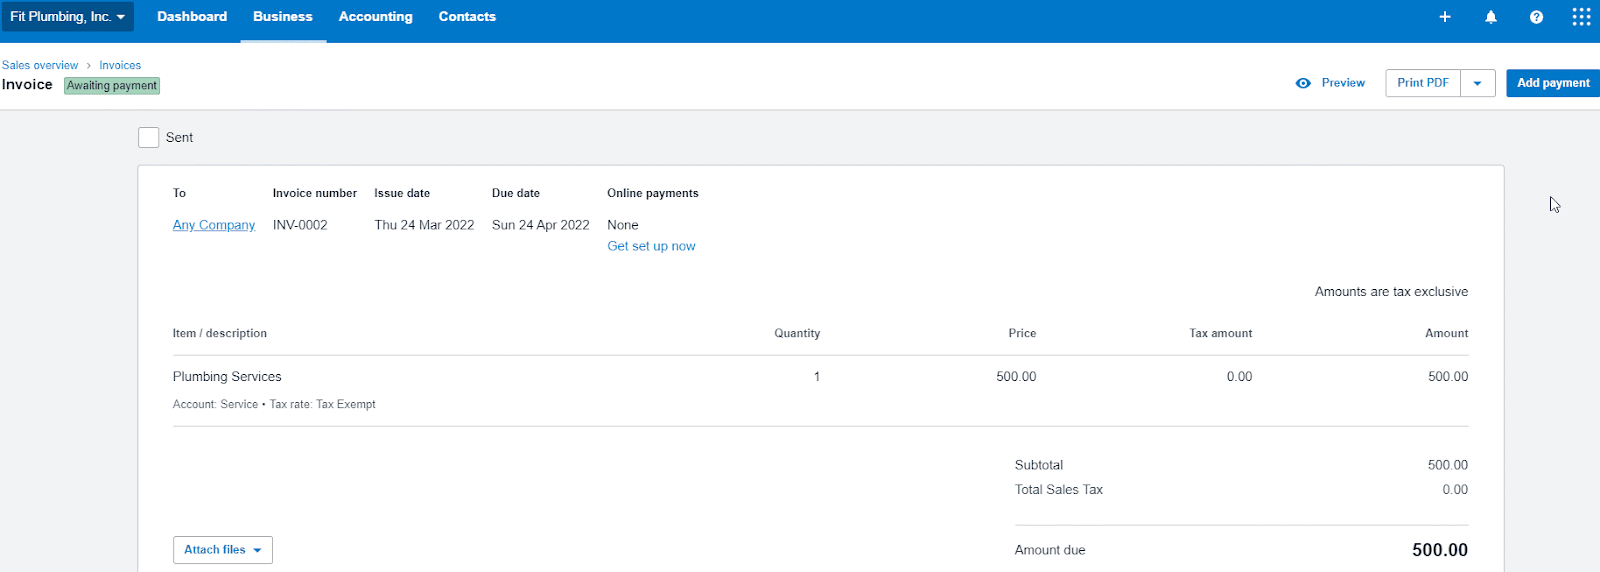
To view a list of your open invoices, click on theAwaiting Paymenttab in theInvoicesscreen. This will bring up a list that shows the invoice number, customer name, invoice date and due date, expected date (if applicable), any amounts paid, and amount due.

Invoices awaiting payment in Xero
Run an Aged Receivables Summary Report
The Aged Receivables Summary report displays the amount each customer owes you, based on the age of the transaction. The total amount includes all outstanding invoices, credit notes, and overpayments. To run the report, follow these steps:
- Step 1:In theAccountingmenu, selectReports.
- Step 2:Find and open theAged Receivables Summary.
Navigating to Aged Receivables Summary report in Xero
To customize the report, adjust the following information:
- 选择一个Date.您还可以单击箭头旁边的日期choose a set reporting period, such asEnd of last monthorEnd of last quarter.
- UnderAgeing By, view aged receivables based on theirDue DateorInvoice Date.
- UnderAgeing Periods, choose the number of periods to display, and the timeframe for each period. You can also choose to display byPeriod numberorDate range.After selecting your options, clickApply.
- UnderColumns, select the information you want to appear on the report, such asContact,Contact Account Number, and more.
- Change the report layout byGrouping/Summarizingthe results based on contact group, tracking category, or total.
- ClickUpdate.
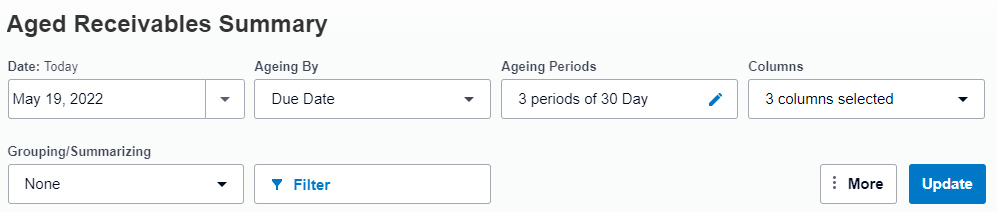
Customizing the report in Xero
Once the report has been generated, you can export it as a PDF to print or save. You can also export the report to Excel or Google Sheets. These features can be accessed by clicking on theExport arrowat the bottom right corner of the screen, as shown below.

Exporting a report in Xero
Recording customer payments in Xero differs based on whether you’re using the New or Classic invoicing mode. As previously discussed, we recommend using the New invoicing mode because it’s faster and simpler. To apply a payment in New invoicing mode, follow these steps:
- Step 1:With the invoice open, click onAdd Paymentin the upper right corner.
- Step 2:Enter payment details in theDate paid,Account, andAmount paidfields. Xero prepopulates the full invoice amount and the current date by default, but you can override these details if they’re inaccurate.
- Step 3:ClickAddto apply the payment.
The payment applied will show under the invoice total. Once you’ve applied payment, clickView Invoice, then click the payment to view the transaction in your bank account.
Adding a payment in Xero’s New invoicing mode
Bottom Line
You have now learned how to invoice in Xero and how to manage customers. The next tutorial in our Xero course series isHow to Manage and Track Unpaid Bills, which will cover how to enter and view unpaid bills, how to record the payment of a bill, and how to add and view vendors. You can learn about this and other Xero features in ourXero Review.