How To Create and Print Custom Reports in Xero
This article is part of a larger series onAccounting Software.
We’re pleased to present this tutorial in Xero, our pick for one of thebest QuickBooks alternativesandleading small business accounting software. In this fifth and final lesson of ourfree Xero tutorials, we’re going to cover how to print reports in Xero, along with how to create and export them. We’ll also show you how to customize basic reporting options.
You’ll benefit most from this guide by following along in your own Xero account. If you haven’t yet subscribed to the platform, you can try it for free for 30 days.
Step 1: Access the Reports Section
To access reports in Xero:
- Step 1:In the top menu bar, clickAccounting.
- Step 2:SelectReports.
The reports screen is divided into five tabs, which you’ll see at the top of the screen:
- Home:All of the available reports can be viewed here, where you can run a new report
- Custom:Reports that have been created and saved for your company are shown here
- Draft:所有报告保存为草稿由你或某人e else in your company
- Published:All reports that have been published by you or someone else in your company; these reports are read-only and require an adviser role to create and delete
- Archived:Any published reports that have been archived by you or someone in your company; these archived reports can be restored if necessary
Click on the tab that displays the type of report you’re looking for, then find and open the report. You can use the search field in the top right corner if needed. Search options include report name, description, keyword, report group description, or user who prepared the report.
Navigating to Reports in Xero
Step 2: Select From the Available Reports
Xero ranks high with both its available reports and the ability to customize them to obtain the desired information. You can select from basic financial statements, specialized reports, and other accounting reports—but it’s missing two reports that would be useful in some cases: unbilled time and income/loss by customer. However, it more than makes up for it with 48 reports to choose from and the ability to create your own report with an empty template.
Here’s a summary of a few of the most popular reports:
- Balance Sheet:View your company’s financial position, and what you own and owe at a particular time.
- Income Statement:Also referred to as a Profit & Loss (P&L), it shows your company’s income, expenses, and profit for a certain period.
- Aged Payables Summary:View a summary of the amount you owe to each vendor, based on the age of the balance owed.
- Aged Receivables Summary:View a summary of the amount that each customer owes you, based on the age of the receivable.
- 1099 Report:Prepare your 1099-NEC and 1099-MISC forms by setting up rules to generate your 1099 report ready to file with the IRS.
- General Ledger:The activity and balances for all of your accounts are shown here. This includes the General Ledger Exceptions report, which shows irregular transactions.
- Bank Reconciliation Summary:Compare your balances in Xero with your bank balance, and check for missing, duplicated, or deleted transactions.
- Depreciation Schedule:查看你的固定资产列表、添加和disposals, and depreciation values.

Available reports in Xero
Favorite a Report
您可以标记一个报告作为一个最喜欢的来访问它asily from the Accounting menu or at the top of the Home tab in the Reports screen under Favorites.
- Step 1:In theAccountingmenu, clickReports.
- Step 2:Select theHometab.
- Step 3:Search the Reports screen for the report you want or scroll down the report in the list.
- Step 4:To add a report favorites, select the star icon next to the report’s name.
Favoriting a report in Xero
Step 3: Customize the Basic Report Options
This will assist you with how to create custom reports in Xero. When generating reports, you can choose how you want to display selected information. To do this, you need the Standard + All Reports, or Adviser user role. The specific settings and how to apply them vary, depending on the report you want to run. You’ll find all report setting options at the top of the report.
Here are a few common options that are available with most reports:
- Columns:Select the checkbox for each column you want to display on the report. Clear a checkbox to hide the column.
- Grouping/Summarizing:Set whether transaction data is grouped or summarized on your report and what variable it’s gathered by. Select Grouped by to view individual transactions sorted by your selected variable, such as by invoice date. Select Summarize by to display totals only for your selected variable.
- Filter:ClickFilterand select a column to filter by, then enter or select details. As you add more filters, the report displays results based on all of your combined filters.
- More:ClickMoreto add or remove additional details, such as the two described below.
- Accounting basis:Located under the More button, selectAccrualto show revenue and expenses according to the transaction date. ChooseCashto show revenue and expenses according to the payment date.
- Decimals:Located under the More button, you can determine whether numbers show two or four decimal places, depending on the column. To show only round numbers, clear the Decimals check box. While it may not be as prevalent, using four decimal places can come in handy if you want the most accurate unit price when calculating inventory costs.
Once you have made your changes, clickUpdateto view the results of your report. The next time you open your report, it’ll reset to the default settings.
In the example below, we have shown how to customize the date range, comparison period, and accounting basis for an Income Statement.
Customizing a report in Xero
Save a Custom Report
Xero allows you to save a report that you have customized to access it easily later. To save a custom report:
- Step 1:Find and open the report you want to edit.
- Step 2:Apply the report settings you want to save for reuse.
- Step 3:Click theSave as Custombutton in the bottom right corner of the screen.
- Step 4:UnderName, enter a new internal reference for the report. This is the name that will show for your custom report, and it can be different from the title displayed on exported versions of your report.
- Step 5:SelectMake custom report the defaultif you want to apply your custom settings to this type of report (for example, an Income Summary) whenever someone runs it in the future.
- Step 6:ClickSave.
To update a custom report, open it to make your changes, and then save it using the same name it was previously saved with. Or you can save the revised report with a new name to create a second custom report based on the first.
Saving a custom report in Xero
Step 4: Export & Print the Report
Before you can print or export a report, you’ll need to have the Adviser, Standard + All Reports, or Read Only user role. You can export reports in PDF, Excel, or Google Sheets formats. Once you have exported the report to the desired format, you can print it. The below information is useful for how to print reports in Xero:
- Xero reports in PDF:For a read-only format, you can export reports to a PDF file. It’s recommended that you use Adobe Reader 6 or above to view PDFs.
- Xero reports in Excel:Old-style reports are exported to XLS, and new-style reports are exported to XLSX. If you’re using a version of Excel that’s older than 2007, then you’ll need to install a compatibility pack to export new-style reports to Excel.
- Xero reports in Google Sheets:You’ll need a Google account to export reports to Google Sheets. You can share the report with anyone, even if they don’t have a Google account. You can also set the sharing settings to read-only.
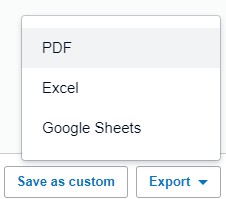
Export options in Xero
Export Report
- Step 1:Select the report you want to export.
- Step 2:Click theExportbutton in the bottom right corner of the screen.
- Step 3:Select eitherPDF,Excel, orGoogle Sheets.
- Step 4:Save or open your exported report.
Once the report has been exported, you’ll be able to print it. See below for an example of how to export an income statement to PDF and print the report.
Exporting and printing a report in Xero
Bottom Line
You have now learned how to create, customize, and print reports in Xero. This concludes our series offree Xero tutorials. We hope that you have found this information helpful and encourage you to revisit these tutorials as questions while using Xero arise. You may also enjoy ourXero Reviewwhere we provide in-depth analysis of Xero pricing and features.